Forms
In this chapter, we get to the core of how Freeform works. Here we describe how to create a new form or modify existing forms using the Form Builder.
# Overviewpage forms
# New form
(image block 1)
With the button New Form at the top right of the page you can start the process of creating a form. Go to the section Form Builder for more information about this topic.
In most cases, some forms have already been created by your website developer.
# Existing forms
(image block 2)
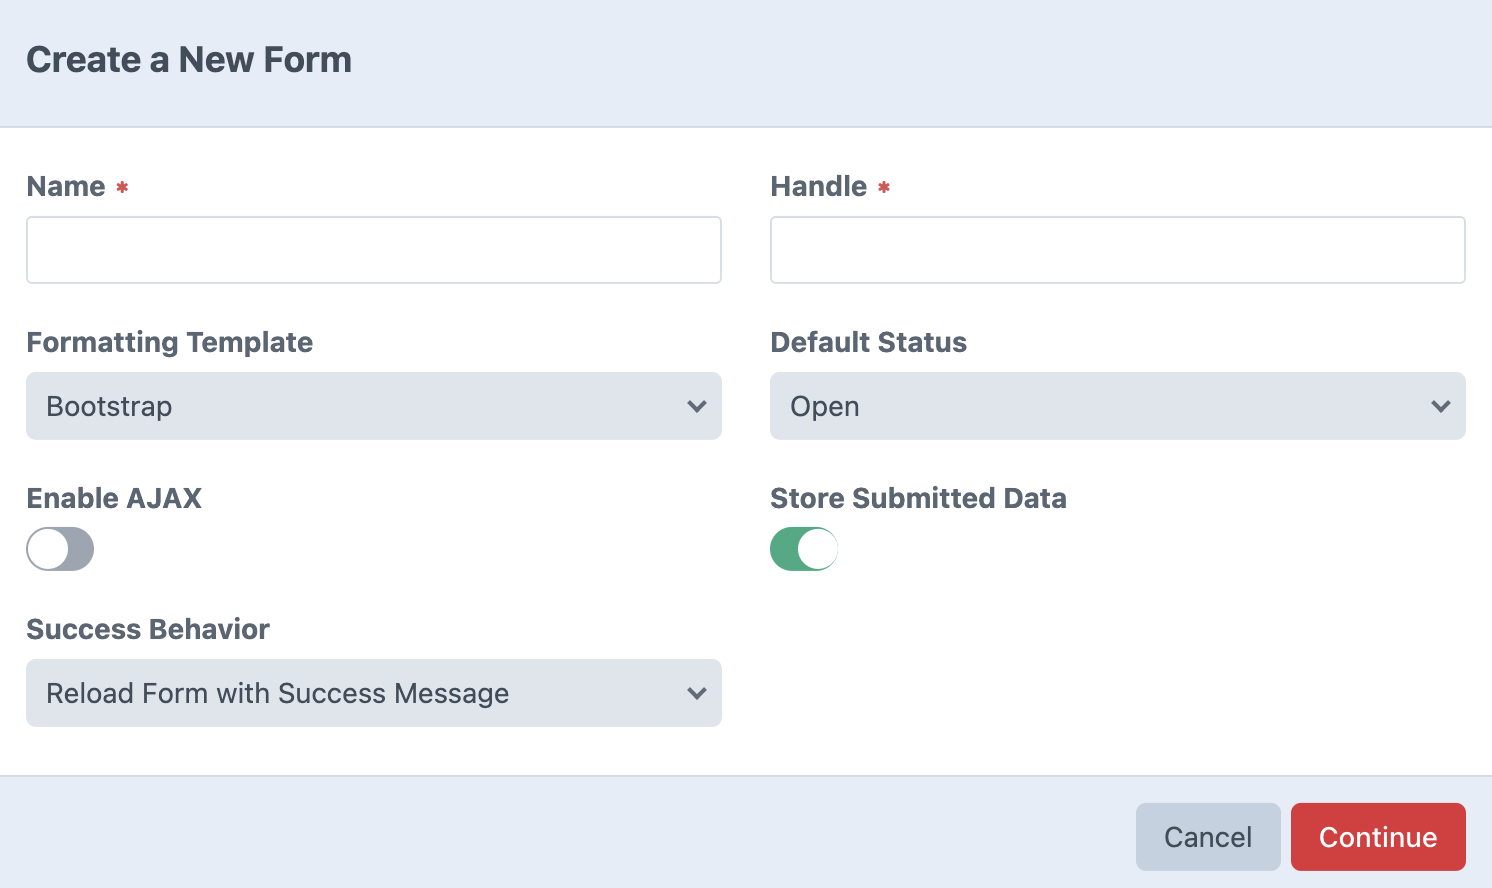
In this block you can see an overview of all created forms. After each formname you can find the handle, description, number of entries and the number of messages blocked because of SPAM.
Behind each row, you have the option to copy or delete the form.

The blue namelink of the form will take you to the Form Builder with its specific fields. Go to the section Form Builder for more information about this topic.
The handle, usually a derivative of the title, is a type of tag that acts as a handle that can be referred to. This means that you can use this handle to display the form on a specific page.
Deleting a form cannot be undone.
# Form Builder
With the button New Form at the top right of the page you can start the process of creating a form.

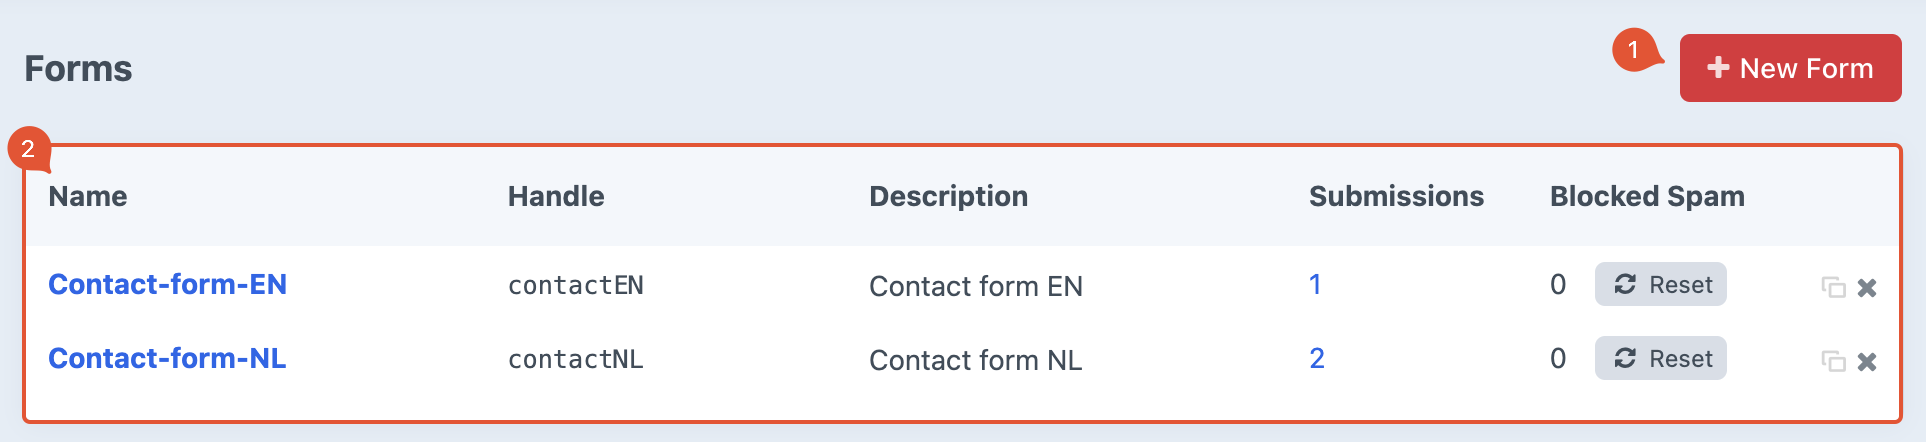
A screen with a few basic settings appears.
# Name
Name the form. For example, 'contact form’.
# Handle
While entering the name, the handle will be filled out automatically. You can change it afterwards, this won’t affect the name.
# Formatting Template
You can choose how the system handles field labels in the actual form.
If you choose Bootstrap the name of the field will be displayed above the entry field.

When you choose Bootstrap 4 floating label the field label will be displayed inside the entry field. As soon as something is entered, the field label automatically moves to the top.


# Default Status
Select the status a submission should get after the form has been used. For example, choose open if an action is required later on.
The list of available status options is usually set up by the developer. Go to the chapter Settigns for more information about this topic.
# Enable Ajax
Turn off when the full page should refresh after the form is submitted.
# Store Submitted Data
Turn off when the submitted data does not need to be saved in Craft. For example, when the completed form is emailed to you and nothing needs to be done with it later on.
# Success Behavior
Choose what the system should do when a form has been submitted successfully.
| Setting | Function |
|---|---|
| Reload Form with Success Message | Current page shows success message. |
| Load Success Template | After success, a predefined page is displayed. |
| Use Return URL | After success you go to a pre-selected URL outside your website. |
Additional options may appear when choosing a specific setting.


Later on you still will have the opportunity to make changes to these settings in the Form Builder.
When ready choose Continue, you’ll be taken to the detailpage of the Form Builder.
# Form Builder detailpage
In this section of the tutorial, we explain the basics of the Form Builder and how to use blocks to build a form.
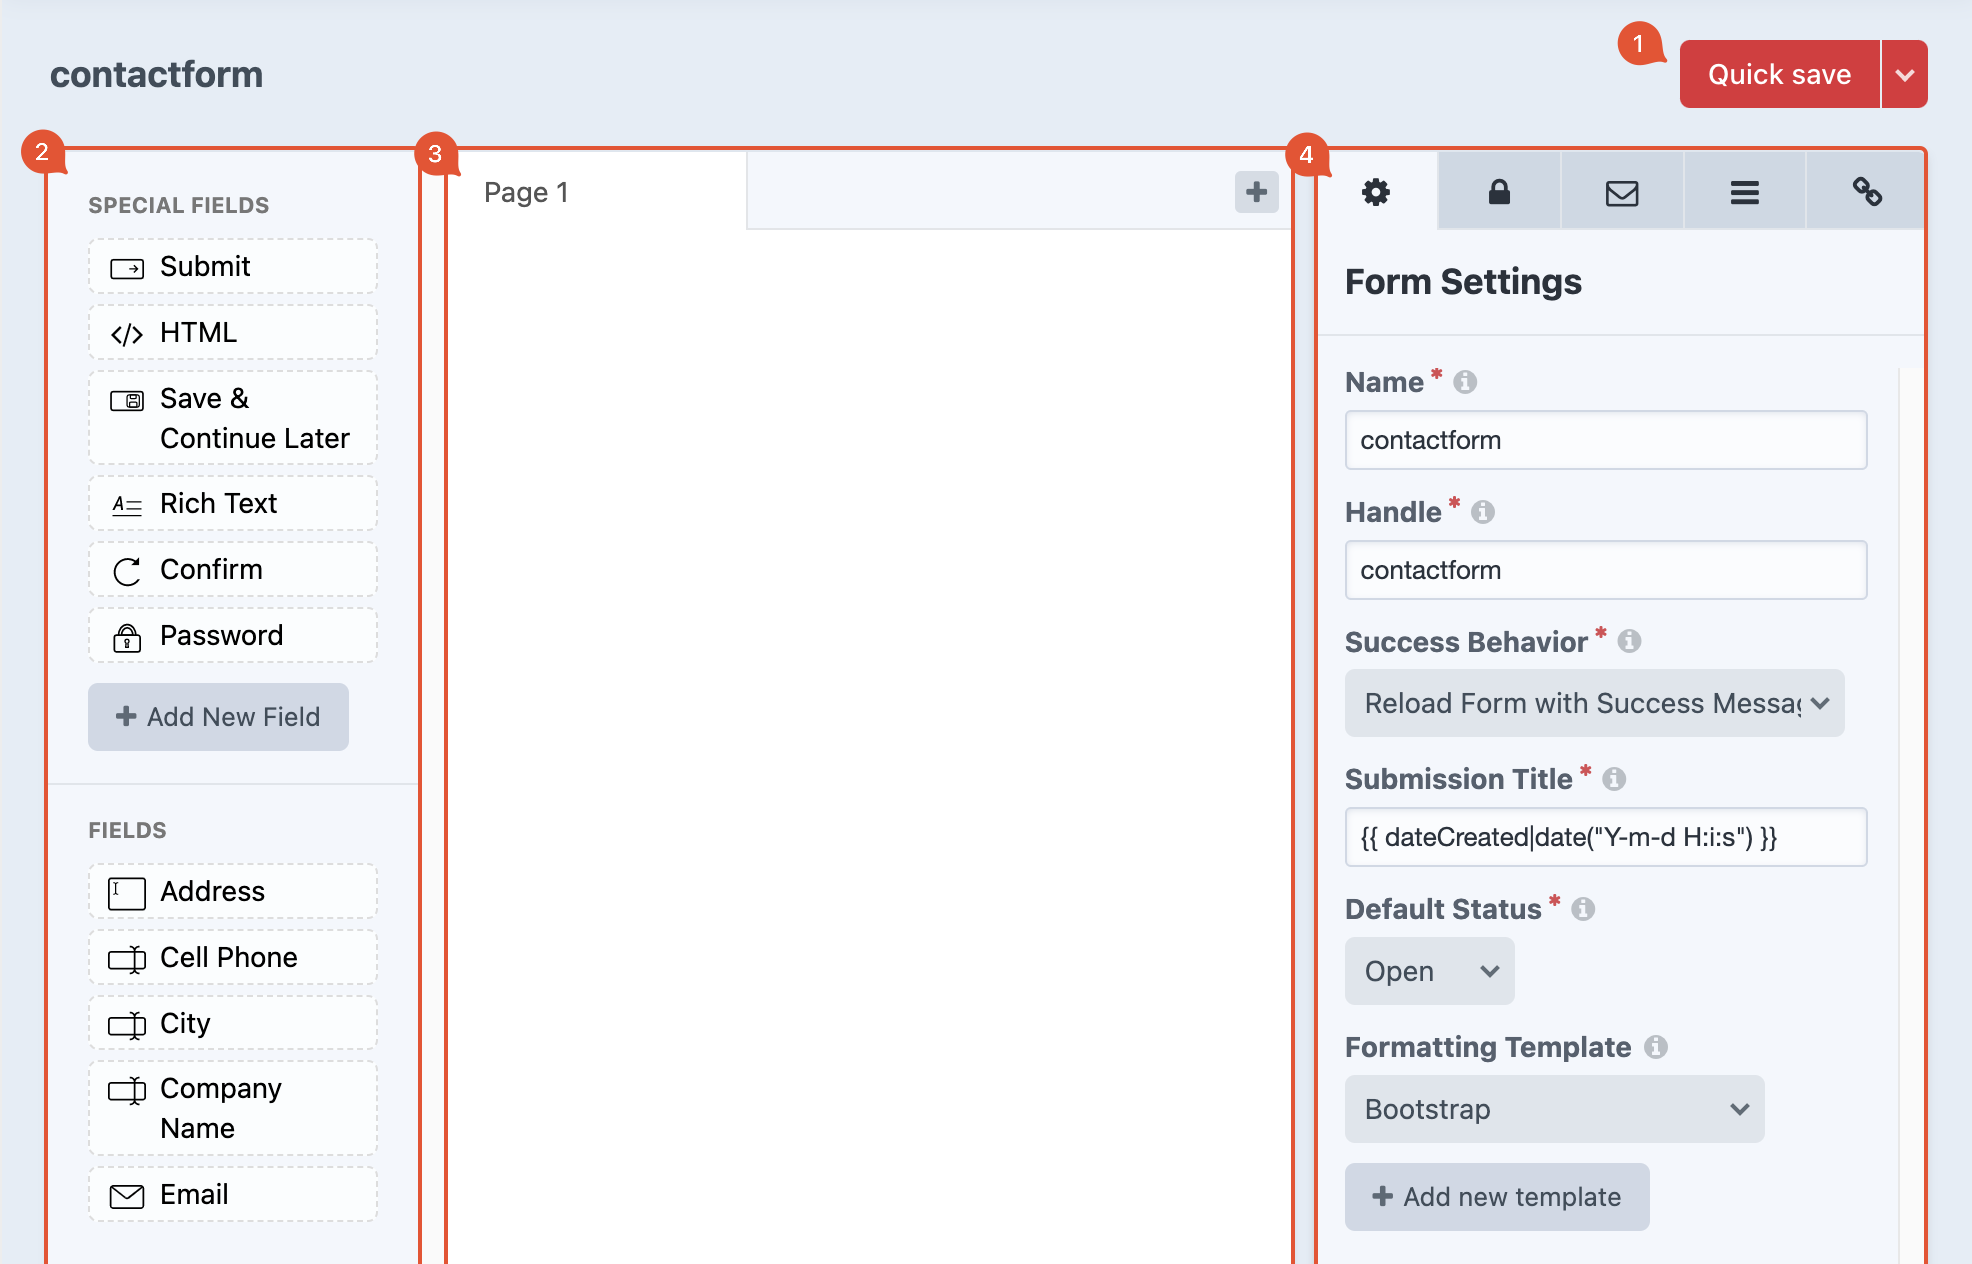
# Save
(image block 1)
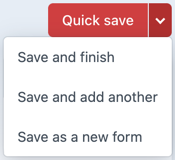
The red Quick save button allows you to save changes while staying on the page and continuing editing. Click the arrow next to it for more options regarding saving.
# Fields
(image block 2)
In this column you can find all available blocks. A cube represents an input field that you can use to build the actual form with.
One by one, drag all the required blocks to the large white canvas.

You can also place blocks side by side by dragging them on top of each other.
Each block can only be used once.
New fields can be added with the Add New Field button. For more information on this topic, go to the chapter Fields.

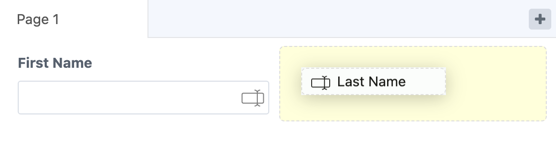
# Canvas
(image block 3)
When creating a new form, you’ll start with an empty canvas. Together with all the blocks dragged onto it, it forms the layout of your actiual form.
A form can also contain multiple pages. With the plus button you create a new page. They can be deleted with the cross behind the title.

Click on the titletab to change it.
# Properties
(image block 4)
In this section, specific properties can be set. Like for example how the title of a submission should be constructed and displayed in Craft, or the content of the message when a submission succeeds or fails. Some settings we have seen earlier such as the handle, status etc.
More information can be found at Solspace (opens new window).
Basically it is not necessary to make adjustments to these properties for the form to work, these are specific settings. This is why we will not discuss them in detail in this tutorial.