Settings
In this section we describe the setup of statuses, briefly the possibilities of integration and where to find error logs (if generated).
# Statuses
With the menu Forms>Settings>Stats you will get to the overview page. Here you can find all statuses that allready have been created. Click on the name of the status to go to the detailpage.
Create a new status using the red New Status button at the top right of the page.
# Name
Name the status.
# Handle
The handle is automatically generated based on what is entered at 'name’. This can be overwritten at all times.
The handle is useally a derivative of the name, is a type of tag that acts as a handle that can be referred to.
# Color
Give the status a color. The color will later show you which status a submission has.
# Is Default
Turn on when a submission should automatically receive this status.
# Save
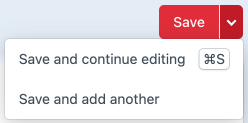
Choose Save, Save and continue editing or Save and add another at the top right of the screen to save the status. After saving, you will arrive at the overviewpage of all the created statuses.

You can change the order of a row using the 4 dots at the end of it. Use the cross to delete the status.
# Integrations
With Forms>Settings>Integrations you will get to the integrations section of Freeform. Here you can find ways to connect to an external service. Through an API or webhook information can then be exchanged automatically. Integrations are often tailor made and very technical. Ask your website developer to create a connection if desired.
# Error logs
You can find the error log menu by following Forms>Settings>Reliability>Error Log. When something goes wrong with Freeform an error log appears in this section. In such a case, an error log can help you find the cause of the problem.
The Clear button allows you to delete all logs and reset the counter to 0.
On the menu on the left side you can find a counter of how many logs with problems have come in.