Tax
In many countries they have a complicated tax system where different layers of tax on a product/region must be calculated. Commerce was developed accordingly and is therefore versatile.
In this chapter, we explain how Commerce handles taxes during the ordering process. The Commerce>Tax menu takes you to settings for tax rates, tax categories and tax zones.
Also look at the section Tax on the Products page for more information.
For the tax section of Commerce to work properly, it is important to set up the following sections (in chron. order):
- When creating the product, you specify which tax category and tax zone it belongs to.
- When creating the tax category you indicate which product types can use the category.
- When creating the tax rate you specify which tax category it belongs to.
Product types can only be set up at System Settings by the developer.
# Tax Rates
# Overview page tax rates

# New tax rate
(image block 1)
Create a tax rate with the button New tax rate. You will be taken to the detail page of the item to be created. Go to the chapter Tax rates detail page for more information.
# Overview
(image block 2)
The overview page shows at a glance what the specific settings are for each tax rate. On the Tax rates detail page, you’ll find out exactly what they mean.
Delete
Delete a tax rate using the cross at the end of the line.
When a tax rate is in use, a line cannot be removed immediately. It is then necessary to check and adjust all the places where it is used.
# Tax rates detail page
# Overview
(image block 1)
Name
Enter the name of the tax rate.
Code
Handle that can be referenced to. Usually a type of key that is constructed from the name.
Taxable Subject

Here you get the option to choose how tax should be applied. Depending on the selection, an extra option appears, namely Tax Category.

Select a tax category from the drop down
Tax Zone
Choose which zone this tax rate applies to. Tax zones can be set up separately. Go to the Tax Zones page for more information.
Disqualify with a valid business tax ID?
Tick if reverse charge may be applied after entering the VAT number by the customer.
Commerce checks during the ordering process whether an entered VAT number is valid.
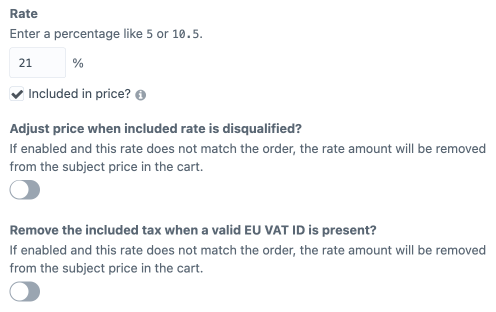
Rate
Enter the applicable tax percentage of the item.

By checking Included in price you can decide if the rate is included into the price of the taxable subject otherwise it will add a cost to the order.
Once checked you get two more options to indicate how the system should handle when rates do not match the order (this may apply when the reverse charge rule is applied).
# Date
(image block 2)
Shows date and time of the creation and update moments.
# Tax categories
During the installation of Commerce, the "General" category is immediately created. Any new product will automatically be assigned to this category. You can create unlimited categories.
# Overview page tax categories

# New tax category
(image block 1)
Create a category with to button New tax category. You will be taken to the detail page of the item to be created. Go to the Tax Categories detail page for more information.
# Category settings
(image block 2)

The cogwheel appears when a category rule is checked. Choose "Set default category" if you want it to be assigned automatically to a new created product.
# Overview
(image block 3)
The overview page shows at a glance what the specific settings are for each tax category. On the detail page, you’ll find out what they mean exactly.
# Detail page tax categories

# Overview
(image block 1)
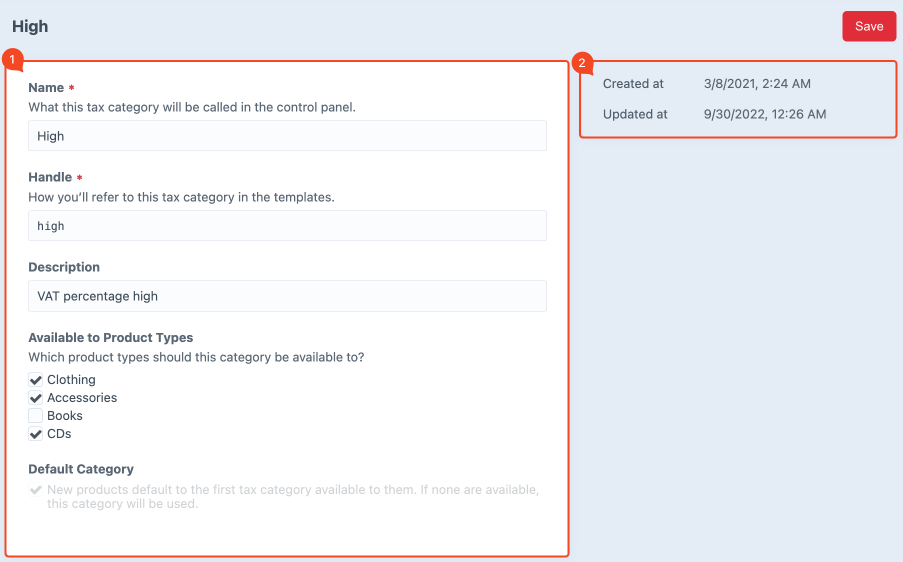
Name
Name of the Category.
Handle
Handle that can be referenced to. Usually a kind of key derived from the name.
Description
Description so that it is recognizable what the category entails.
Available to Product Types
Check the product types to which this product category applies.
Default Category
When the check mark with description is light gray it means that this is the current default category and is automatically selected when creating a new product.
# Date
(image block 2)
Shows date and time of the creation and update moments.
# Tax Zones
While ordering, Commerce can calculate the applicable tax based on the customer’s location. This can be set up with Tax Zones.
# Overview page Tax zones

# New tax zone
(image block 1)
Create a tax zone with to button New tax zone. You will be taken to the detail page of the item to be created. Go to the Detail page Tax Zones for more information.
# Overview
(image block 2)
On the overview page, you can see at a glance what the specific settings are. On the detail page, you’ll find out exactly what they mean.
# Detail page Tax zones

# Overview
(image block 1)
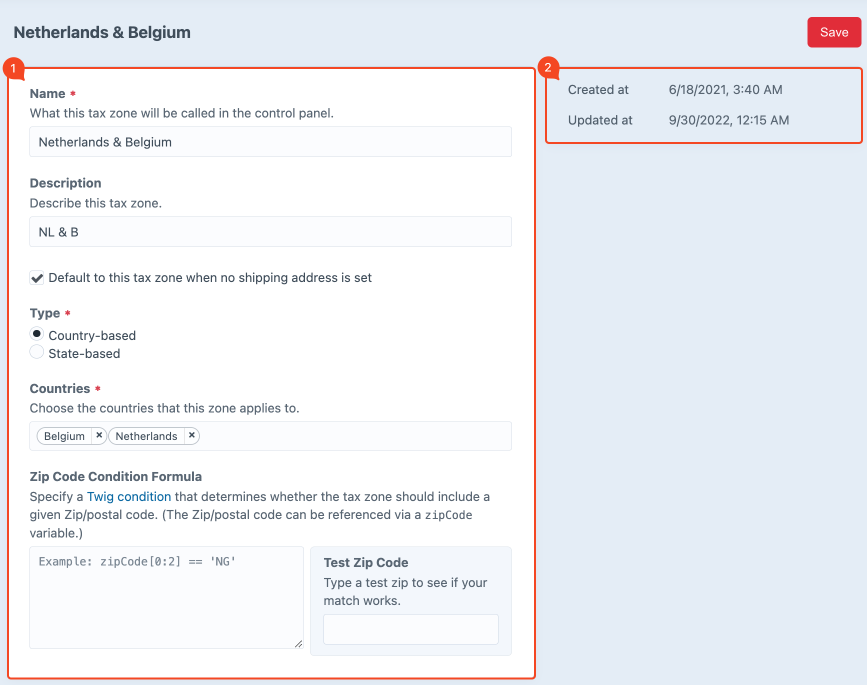
Name
Name of the zone.
Description
Description so that it is recognizable what the tax zone entails.
Default zone
If checked, this zone will be used when no shipping address is set.
Type
Choose whether the system should look at a country or a province during the ordering process.
Countries/Provinces
After clicking in the field, the system displays the available countries or states. Select the applicable items of the zone.
The list of items you can choose from must be set up in advance in Commerce settings.
In this example, we chose to include the Netherlands and Belgium in the same zone because the high tax rate has the same percentage (21%).
Zip Code Condition Formula
A special formula (Twig) can be used to include or exclude certain zip codes or zip code areas.
# Date
(image block 2)
Shows date and time of the creation and update moments.