Assets
In this chapter we will show how files can be organized and managed in Craft. Files are called assets, you can find them via the Assets menu. The most common files are images, but Word files, Excel sheets, PDFs and so on can also be uploaded.
Depending on the situation, files are stored into a specific folder. Both the Craft test environment and the production environment might be using these files. Therefore, it is important to know that deleting a file in the test environment can make it unavailable on the production environment and thus break your website.
# Page overview
Items that already have been covered in the chapter General operation of the overview page will not be described here anymore.
# Organise Assets
You can organise Assets easily by dragging and dropping them to a created folder of subfolder.
After moving an Asset to a different location the path changes automatically.
Keep in mind that making changes to the path of an Assets may affect findability!
# Viewing options Page overview
(regarding image block 1)
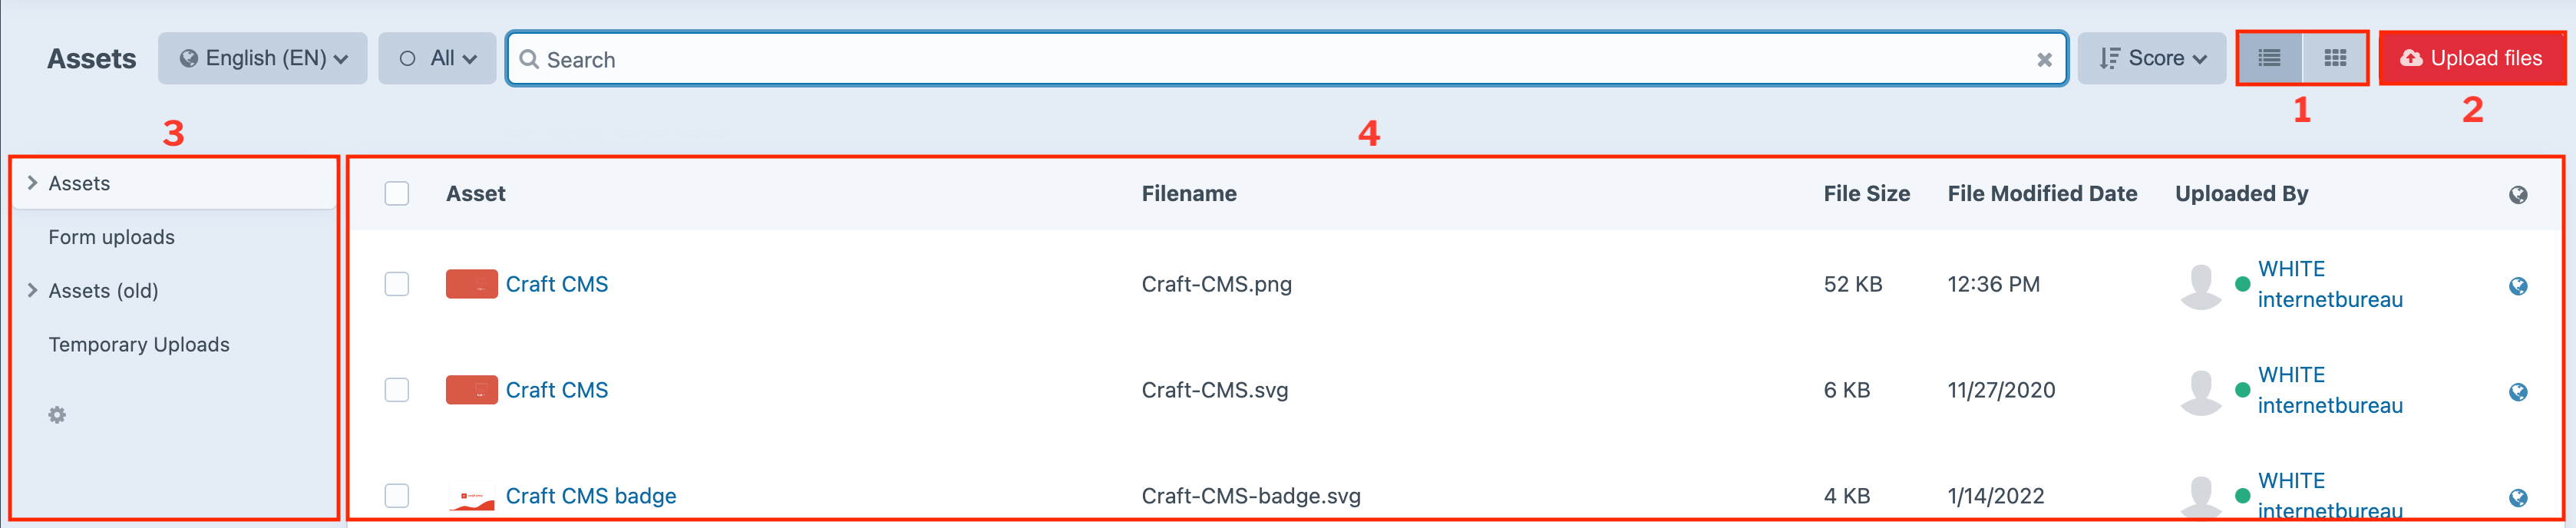
The way available Assets are shown on the page overview can be adjusted. There are two different options: list view or thumbnail view.
You can find the button to switch views at the upper right corner.

# Uploading Assets
(regarding image block 2)
You can upload one or more local files at the same time to Craft with the button Upload files. Common supported file formats are PDF, PNG, JPG and SVG.

Files can also be uploaded without using the Upload files button. Drag and drop one or more files at a time into your browser window. The upload will start immediately.
The maximum size of a file that can be uploaded depends on the developer settings. Both Craft and the server where Craft is installed have their own limits. Usually, this is set to 16 MB per file. We recommend to keep the resolution of images as high as possible. In case of doubt or limitations, please contact the developer.
# Menu view
(regarding image block 3)
Go to chapter "Algemene werking overzichtspagina - Kolom- & menuweergave" for a detailed description of how you can customise your menu.
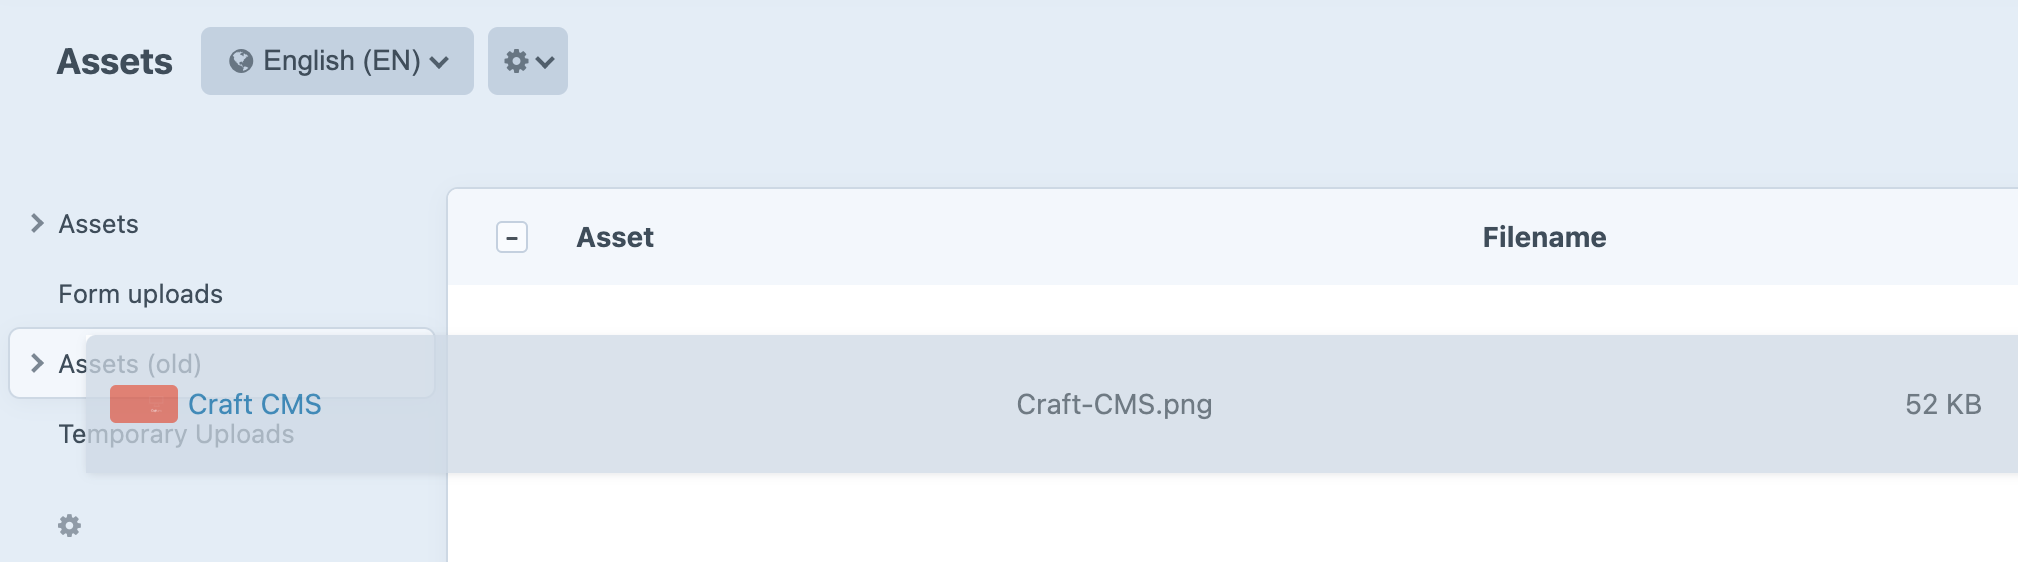
Create folders and organise your images properly. Right-click on the menu to create a new subfolder.
# Adjusting assets
(regarding image block 4)
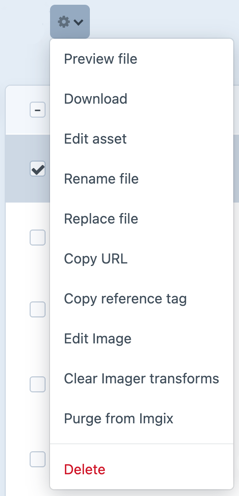
It is possible to edit or adjust files after uploading them to Craft. Tick the file you would like to edit and go to the cogwheel next to the language selection menu. Some options belong to installed plugins.
If you check multiple files at the same time, only the available options will appear in the menu.
# Preview file
Shows a preview of an image.
Tick an image in the overview page and open the viewer with SHIFT-spacebar to easily browse through images. Arrow ⬆=next and arrow ⬇=back.
# Download
Tick one or more assets and choose Download to transfer them to your computer. Useful when you no longer have the original asset.
# Edit asset
Opens the detail page of the file. You can read more on this topic later on.
# Rename file
For a website visitor, the name of an image is also visible when it is downloaded. Therefore it can be useful to have the the possibility to change it without having to change the name of the file locally first.
# Replace file
Replaces the selected asset with a new one. Images displayed on several different locations will be replaced at once with one simple upload. This gives you the advantage of not having to delete, upload and fix the reference of each single image on a web page.
# Copy URL
Copies a link to the file in the clipboard. It gives you the possibility give it to someone directly.
# Copy reference tag
Every item has its own unique ID. Usually only used by Craft itself.
# Edit image
Opens the image in the Craft image editor. In this environment you can do simple edits without needing a dedicated tool. Changes made are visible on each single place where this image is used.
Vector files (SVG) cannot be edited.
Rotate/flip
Turn images left or right in 90° increments.
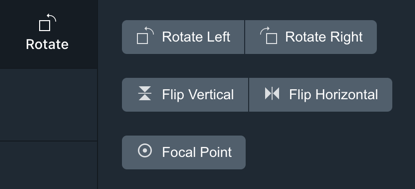
Use mirroring to make the left side become the right side or the top become the bottom.
The degree wheel can be used to rotate an image in 1° increments.

Crop
The editor places a grid over the selected image. Grab the corner and drag it to change the size of the grid. Anything outside the grid will be cut away. It is also possible to choose a predefined ratio like square etc.
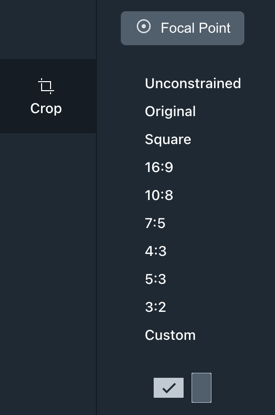
At the bottom you will find the option to orientate horizontally or vertically.

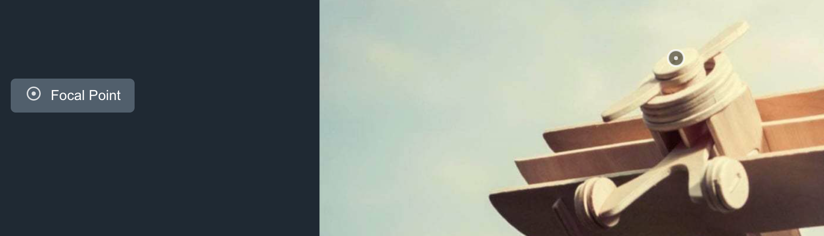
Focal Point
When cropping an image, you can choose to set a focal point. Choose Focal point and mark the place on the image where you want the focal point to be. By doing this Craft is able to use this focal point setting to automatically crop images. This gives you the advantage of not having to create and upload multiple variations in size of the same image.
Save
Choose Save to apply the changes made or save as a new copy with Save as new material.

# Delete assets
Tick one or more images to be deleted. After this the cogwheel button appears, choose Delete.
# Detail page
Click on the title of the file to go to the detail page.
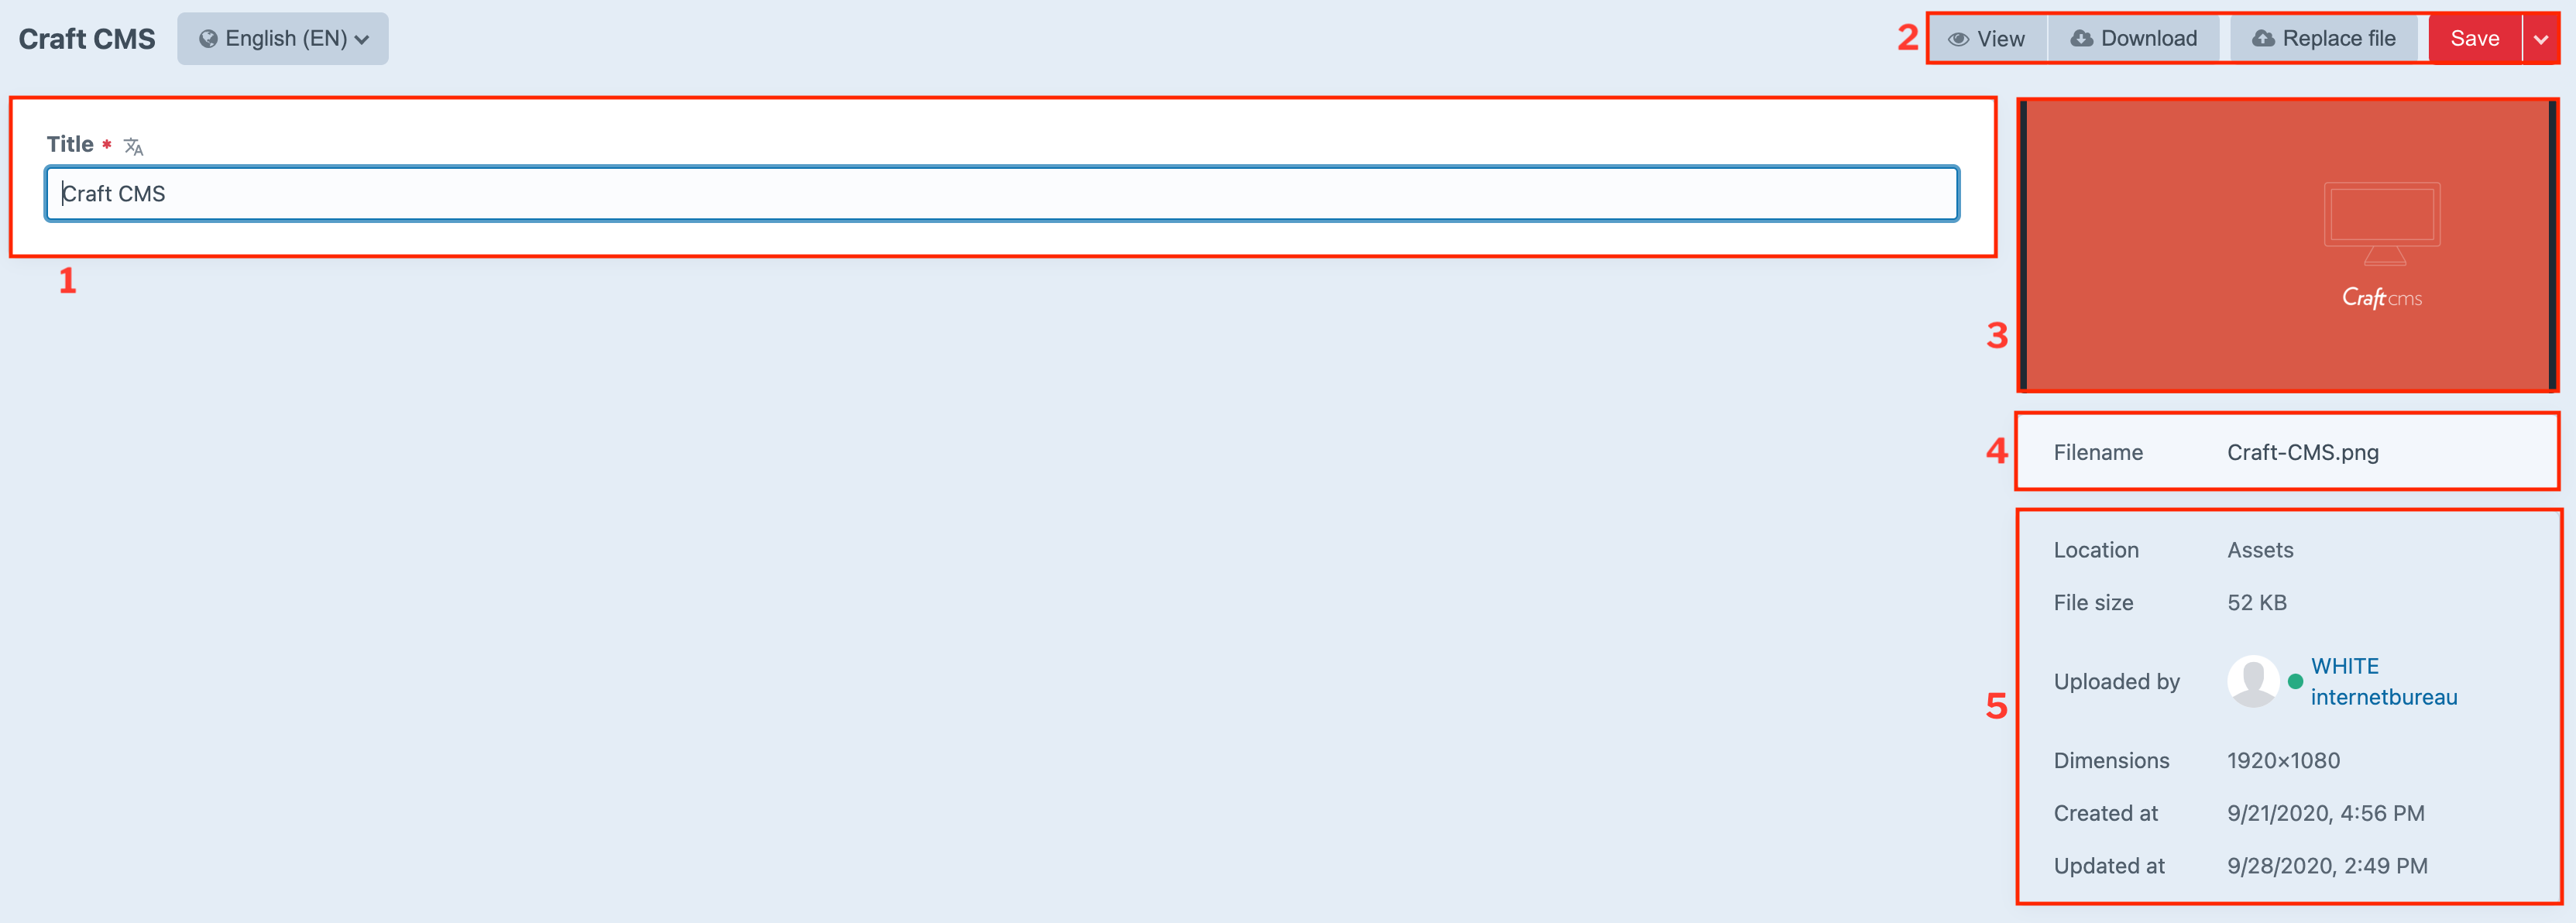
# Title
(regarding image block 1)
After uploading a file, the filename appears here as title. The title can be changed if desired.
# View & Save
(regarding block 2)
# View
Opens the image in a new window.
The View button only appears in case of an image.
# Download
Gives you the possibillity to save the asset to your local hard drive.
# Replace file
Replaces an asset with a new one. In case of an image Craft replaces them on all used locations on your website. This gives you the advantage of not having to upload everything and setting the path to it again.
# Save & Delete asset
After saving, all changes will be saved and you will return to the overview page. At the side of the button you can find a small arrow pointing down. Here you can find the options to save and continue editing or to delete the asset.
Use CTR-s to save and continue editing.
# Filename
If necessary, the name of the uploaded asset can be changed here.
Don’t forget to include the extension of the asset. Otherwise, this will result in an error message.
# File details
# Location
Shows the path to the location of an asset.
# File size
Shows the size of an asset.
Best to upload images in the highest quality if you’re using Imgix. But not larger than 16MB, which is the maximum for images in Craft.
# Uploaded by
Shows which user uploaded the file.
# Dimensions
Shows the size of an image.
The dimension section of an asset only appears in case of an image.
# Created at
Date and time of uploading.
# Updated at
Date and time of the last change made to the asset.